Back to the 'Dacks.
Rogers Rock in July whetted my appetite for more climbing in the huge Adirondack park. Adrian too was eager to get out there. We thought about doing an ultra-long one day strike on the region in August, but the prospect of so much driving to and from NYC in one day ultimately turned off the both of us. Instead we resolved to find a weekend in the autumn in which we could get in two days of climbing up there.
Somehow when I mentioned the plan to my wife her head did not explode. I told her that I might try to disappear for two days of climbing and she calmly responded that early September would probably be my best chance to go, given her busy work schedule later in the fall.
And so we found ourselves on a climbing road trip. As we left the city I almost couldn't believe this was happening. At times it had seemed events would conspire to derail our plans, but in the end neither tropical storm damage nor my cat's visit to the animal emergency room (she swallowed a sewing needle) got in the way. This was too easy. I'm still waiting for the other shoe to drop; there's no way I get to be this lucky. I'm going to pay for this trip at a later date, of that I am certain!
As the magical weekend approached I became more and more excited at the various possibilities. I sent annotated PDF's of various sections of the Lawyer/Haas guidebook to Adrian. I considered Poke-O Moonshine Cliff, the Spider's Web, Upper Washbowl, Pitchoff Chimney Cliff, Chapel Pond Slab, the King Wall... the options were seemingly endless.
Ultimately we decided to hit Poke-O on day one and Upper Washbowl on day two. I knew we'd get just a taste of Poke-O (an enormous cliff) in one day, but I wanted to experience more than one place. I figured we'd do a few long classics there and then maybe if we were speedy the next day we could do most of the good lines on the Upper Washbowl. I didn't realize until later that by choosing these two destinations we had set ourselves up for a tour of the routes of John Turner, a visionary climber who was active in the late fifties and early sixties and who is famous for his sandbagged moderate vertical crack climbs all over the Northeast.
When we arrived at Poke-O there were two other cars in the lot at the defunct state campground. As we should have expected, we found both of these groups of climbers at the base of our first route (and first Turner climb of the weekend). This was, of course, Gamesmanship (5.8+), the most popular climb at Poke-O. Fortunately, the first party was already moving fast up pitch one and the second party had decided to do the neighboring single-pitch climb The Sting (5.8) while they waited. So, technically, Gamesmanship was actually open, or at least we deemed it so. The leader of the second party seemed to think he had the right to reserve his spot in line for Gamesmanship while he was climbing a different route! Adrian and I both thought that was utter nonsense, but I wondered aloud to Adrian whether we'd create a scene if we went ahead of them and hopped on Gamesmanship. Adrian solved this by loudly announcing our intention to start climbing. No one dared try to stop us so we were in business. It turned out we were much faster than the party we leapfrogged, anyway, so it was all for the best. I have no regrets.

(Photo: Pitch one of Gamesmanship (5.8+). The pink rope heading left is on The Sting (5.8).)
Gamesmanship is a five-pitch climb that goes all the way to the top of the cliff, but many parties skip pitch five, which is an undistinguished, poorly-protected 5.2 slab. The big attractions of the climb are the sustained 5.8+ handcrack of pitch one and the twin vertical "ski track" cracks of the 5.7 pitch four. The guidebook describes pitches two and three as being of lesser quality.
Supposedly the crux of the route comes in the first ten feet, at a pod just off the ground. I knew as soon as I looked up, however, that for me the rest of the pitch would be harder than the pod because I don't have much experience climbing vertical cracks. I remembered what a crappy climber I became on Reppy's Crack (5.8) at Cannon last year. Immediately I chickened out and offered Adrian the lead. Crack specialist that he is, he flew right up, expressing joy at the quality of the jams.
As I expected, I didn't fly right up. The pod at the bottom was definitely a little tricky, but this was a type of climbing I could deal with; little edges and a couple long reaches get it done. What I mostly remember about the rest of the pitch is that I thought it was great, and that I felt insecure and challenged the whole way up. I made it through without any falls or hangs, but I repeatedly expressed thanks not to be on the lead, and I tried not to be depressed at how hard I found the climbing. This was the learning experience I needed, I told myself. I'd be a better crack climber for it.

(Photo: looking down the 5.8 pitch two of Gamesmanship.)
Pitch two was my lead, and I enjoyed it. While neither as sustained nor as aesthetically pleasing as pitch one, it is still a quality pitch, with a little bit of face climbing and a little bit of vertical crack. I thought it was easy for the grade. I'm not sure where the 5.8 crux is supposed to be.

(Photo: The throwaway pitch three of Gamesmanship. Adrian is almost to the ledge where he'll head right to a tree.)
Adrian dispatched the easy 5.4 pitch three in no time. The pitch exists only to get you through the broken dike rock and right to the base of the obvious cracks ascended by the 5.7+ pitch four. This fourth pitch was my lead, and it looked gorgeous from below. I found it fun to lead, but in my opinion the great cracks don't go on quite long enough. Soon you reach lower-angled rock where you have to climb past a couple dirty bushes up a corner to the belay.

(Photo: A butt shot of me leading the 5.7+ pitch four of Gamesmanship.)
Actually I realize in retrospect that this pitch was a lost opportunity. It follows a pair of cracks, the left one a perfect vertical handcrack, the right one more featured. I found it easy enough to climb it by mostly holding the right edge of the left handcrack and using features in the crack on the right. In other words, I didn't do much jamming. I should have forced myself to do more. It would have been good for me, and more secure besides.
After we rapped to the ground we found The Sting (5.8) open, and since it was Adrian's turn to lead he jumped right on it. The first few moves follow the crux of Gamesmanship through the pod, then a thin traverse left leads to another long vertical handcrack. This is another great pitch, certainly the equal of its neighbor to the right. It is also quite a bit easier. Or at least, I thought so. The pod and thin face climbing left are just the sort of climbing I like, so I didn't worry there. And the jamming is much less continuous than on Gamesmanship. I got to the top of this pitch wishing I'd led it.
After The Sting we wanted another multi-pitch climb so we took a look at Bloody Mary (5.9+). And once we looked at it we had to climb it. It is truly impressive, heading up an imposing, steep corner. The second pitch looked strenuous but, to me, it seemed not that bad. I liked the looks of the steep layback flake and the section above, which stemmed between two corners, seemed doable. It wasn't a jamcrack so I thought "why not?" Still, I was intimidated by the climb's reputation as a Turner testpiece, which stood as the hardest climb in the 'Dacks for more than a decade. Eventually I decided to be content with leading the 5.6 pitch one, which turned out to be a nothing pitch to get you to the base of the crux corner.

(Photo: Adrian about to attack pitch two of Bloody Mary (5.9+).)
As Adrian set off on pitch two I was kicking myself for not taking the lead. But then it started looking pretty hard as Adrian came around the first layback crack and then entered the stemming portion between the two cracks. As Adrian got to the part of the pitch where the left crack ends and the guidebook mysteriously suggests an "unlikely" move onto the face, he was suddenly airborne. Unsure if he was to step left or continue just a bit further upward, he'd chosen to head up and slipped out of the crack.
Adrian was unharmed in the fall but he wasn't sure how to continue. I read him the entry in the guidebook, which seemed to suggest going further up the face to the left, but it also mentioned an anchor on this left wall that neither of us could see. The topo seemed to indicate that the pitch went up right, not left, into the tiered overhang above, but the description said nothing about this.

(Photo: Pitch two of Bloody Mary (5.9+).)
Suddenly Adrian spotted a bolted anchor to the left and headed for it. By the time he got there I realized this was a mistake. The bolted anchor was for the neighboring line to the left. But Adrian was already there, so he put me on belay and up I went.
I found the climbing strenuous but not mysterious, at least at first. I made it up the layback crack through an overhang, thinking it resembled Roseland in the Gunks. Then the stemming began, and this was heady. I wasn't sure how I'd feel leading this. It was mostly opposition keeping me on; there were few real footholds on either side. As I approached the point where Adrian popped out I tried to suss out the next part of the pitch. I was sure now that we were supposed to have headed up into the weakness in the overhang. I thought I could now spot some fixed crappy anchor up in there on the left. I wondered if the climbing up the face to the overhang would be easier, or harder, than what I'd been doing?

(Photo: Throwing in a chicken wing in order to get a rest on Bloody Mary (5.9+).)
Then, unexpectedly, I popped out, just below the point where Adrian had popped out. Screw it, I thought, I'm not leading the rest of this. We'll come back some other time and do it right. I headed left to the bolts and we rapped off.
It wasn't time to end the day, and I felt I still hadn't challenged myself, so I decided to try a slightly harder lead. P.T. Pillar (5.8+) seemed like a nice choice. It is a single-pitch climb up a corner. The guidebook contends it is often unfairly overlooked. The "P.T." stands for Positive Thinking, which is a popular ice climb in the winter, just to the left.
The climb ascends the left side of the pillar, at a crack in the back, against the main wall of the cliff. I resolved to jam, jam, and jam to the top. But it didn't really work out. If I faced to the right it seemed impossibly overhanging. If I faced the smooth back wall there were few holds. The crack seemed too wide most of the time for jams. I ended up worrying my way up the route, making frequent layback moves with insecure feet. Strenuous roof climbing got me past a big death block wedged in the crack about one third of the the way up. Continuing, I jammed my feet in the vertical corner crack whenever I could, but it was very awkward. A little more than halfway up I stopped and took a hang on a cam. Then I fell trying to get back in the crack. Then I finally powered through the rest of the pitch.

(Photo: Adrian cruising up P.T. Pillar (5.8+), just below the wedged death block.)
I had Adrian lower me from the fixed anchor so I could belay him from the ground. He proceeded to cruise up the freaking thing. He turned to the right and put his back on the smooth wall, often pinning a bent left leg with dropped knee behind him.
He made it look so easy I wanted to kill him.
Near the top, where I had been pumped and feeling like shit on the lead, grunting through the last few moves, Adrian found a no-hands rest and chilled there a while, sorting gear. Grrrrr.
When Adrian came down he said "I climbed it like a chimney. When you have a smooth wall like that it's usually a good idea to put your back on it."
Okay, noted. Why didn't he tell me that before? I know I say I don't want beta, but any idiot can tell I don't really mean it...
I couldn't wait to get out of there and get a drink. After fighting with vertical cracks all day I was worn out.
I loved Poke-O. It's a big cliff with tons of great stuff we didn't even see. My day there mainly demonstrated to me that I have so much to learn. And that if I'm going to get the schooling I need I have to get out of the Gunks more often.
Coming soon! More Turner classics at Upper Washbowl Cliff: Hesitation (5.8) & Partition (5.9-), plus the Weissner Route (5.6).


 So a couple of our rangers ran into some guys going for a speed record on the summit last week, they were able to get a brief conversation and snap a photo of them before they took off downhill. According to their clocks they made it from Paradise to the summit and back to Paradise in 4 hours and 19 minutes...which if you aren't familiar with that route means they went really really fast! Check out their full story here. There have been a number of speed ascents over the years but as far as we know Nick and Eric were the first to do it with skis.
  The Cholla Garden was planted by Mother Nature. You do see the Cholla in other areas of the park but usually just a few hanging out together. Here in the garden they grow in abundance.
 The cholla also have incredibly sharp, hooked needles that are difficult and painful to extract if you happen to get one stuck on you. I was very, very careful walking through that garden!
 The Ocotillo are interesting also. They can get quite tall, this one was about 15 feet high. Much of the year it looks like a bunch of spiny dead sticks. But after it rains, the Ocotillo is covered with very small leaves. Like other deciduous trees, the Ocotillo loses it's leaves but not due to the changes in the season. Rather, for the Ocotillo, the leaves fall when there is no water. The long stems are often used for fencing material and for walking sticks.
 The bright red flowers of the Ocotillo appear on the tips of the stems in spring and summer.
 A “tube” of Ocotillo flowers.


 The Boston Lady Roadster is a classic loop frame bicycle, available custom built from ANT. This fact in itself is remarkable. If you are wondering why, I invite you to find other framebuilders willing and able to build a loop frame, or even capable of discussing such a thing without laughing. Until recently, most framebuilders' idea of a "women's bicycle" was a diamond frame roadbike painted pink, or with pink handlebar wraps. Now mixtes have began to pop up as well, but for city riding they are not quite as comfortable as the classic curved step-through. The fact that ANT has chosen the loop frame as one of their flagship models carries significant implications for the recognition of women in urban cycling. It also says something about the framebuilder's skill. It is difficult to make that curved top tube, to get the form just right both structurally and aesthetically. So I feel that this frame is one of the most specialised and special things ANT has to offer.
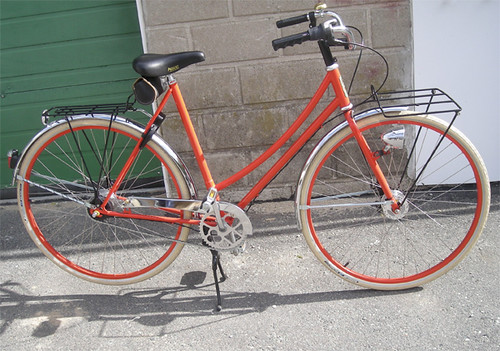 The Lady Roadster is available in many colours, with the option of matching rims and a choice of black or cream tires. The bicycle I tried was in a colour I would describe as "Vermilion" or "Cadmium Red Light" in painters' pigment terms. I must say, ANT knows how to put together colours. The combination of the vermilion frame, matching rims, cream tires and steel fenders is timelessly classic and elegant. At the Open House, someone asked me what I think of putting matching fenders on this bike, and my thought on that was "no". With a bright colour like this, I think it is easy to overdo it and make the bicycle look like a toy. To my eye, the clean steel fenders are a good counterweight to the extravagant frame and rim colour; it's all done just right. If it were my bicycle, I would ask for brown leather accessories and a steel quill stem for a more classic look, but that this is a matter of personal choice.
 One of my favourite features of the Boston Roadster is the mount for the dynamo-powered headlight. Welded to the fork, it looks like a little tree branch. Having a low-mounted light like this is better for illuminating the road than having the light on top of the fork or on the handlebars, so this feature serves a practical purpose as well.
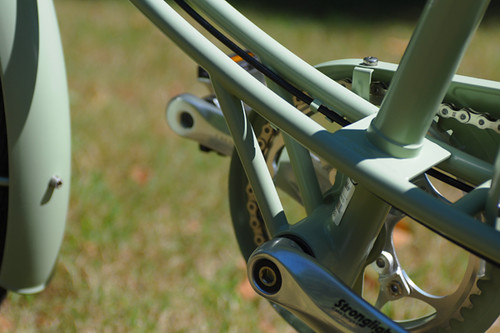
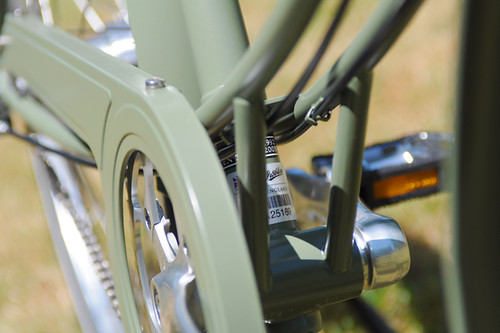
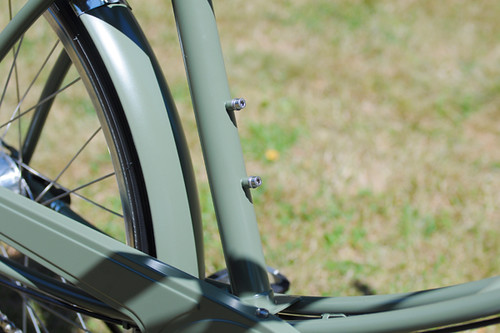
 This shot may not speak to you immediately, but I wanted to point out the kickstand plate. Not all bicycles are made with one. Also note how neatly all the joints are welded: clean and pretty.
 The "full suit" chainring and steel chainguard.
 A prototype full chaincase is in the works - to be coated to match the frame colour. I am excited about this development. I have also been discussing dress guards with Mr. Flanigan, and I think you might be seeing something on that end as well pretty soon.
 As you can tell by my ridiculous facial expression and firm grip, I liked this bicycle quite a lot and was excited to try it. The owner and I are similar in height, so the frame was just right for me.
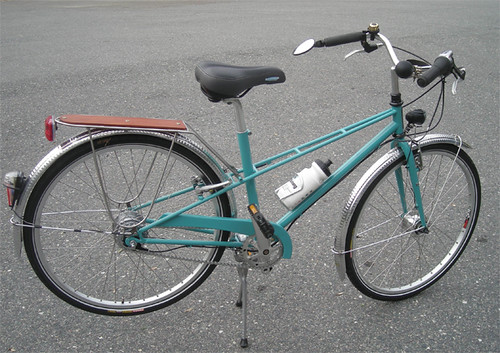 I am not certain whether ANT plans to offer the Mixte as a standard model, but they certainly can build it as a custom order. This turquoise mixte belongs to Betsy, Mike Flanigan's parter, and it is fairly unusual. As you can see, it is built with the classic twin lateral stays - but it lacks the rear stays that typically connect the seat tube to the rear drop-outs.
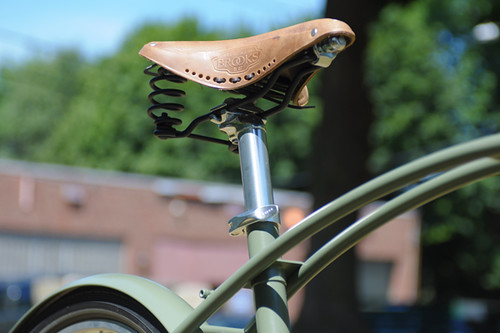
 The frame was a size too small for me, but with the saddle raised it was fine. The bicycle does not feel like a mixte to ride - at least if you are accustomed to vintage mixtes, which were designed with road bike and sometimes touring frame geometry. It is much more stable, sturdy, and easier to operate than the typical mixte I am used to, with a relaxed sitting position, wide tires and an 8-speed hub. The bikewas geared low and as a result was able to fly up the hill in a fashion I had not experienced before with hub gears. It was not a road bike, that's for certain. But I wouldn't describe it as a city bike or a "cruiser" either. Town and country? Yes, that seems about right. And with the wide tires, it is probably suitable for a variety of on and off road terrain.
 A close-up of the twin lateral stays and a gratuitous shot of my face in the rear view mirror. As on the Boston Roadster, you can see the nice clean welds.
 View from the saddle.
 Custom rear rack with a wooden base; hammered Honjo fenders. Shimano 8-speed hub.
 Dynamo-powered headlight.
 Retro bicycle horn on the handlebars. It cannot be denied that ANT has an eye for beautiful eccentricity - a definite plus in my view.