
(Photo: Getting ready to commit to the crack on the 5.6 pitch two of Pete's Farewell.)
It seems I can't get enough of climbing in the Adirondacks.
Columbus Day weekend seemed like a good opportunity to go hiking with the kids. The weather was forecasted to be outstanding, with highs upwards of 70 degrees. My wife and I made last-minute arrangements to rent a house in Keene Valley. We were set for three days of hiking. Then my wife suggested that on one of the days maybe I could go climbing, if I got a partner.
It sounded like a great deal to me. Done! Show me where to sign.
Adrian was willing to come up and crash on our couch so I was in business.
We got a reasonably early start on Saturday and arrived at our first destination, Pitchoff Chimney Cliff, by 8:00 a.m. This cliff sits in a pretty location, right above Cascade Lakes. It is just seconds from the road and has a couple very good moderate climbs on it. So it is no surprise that it has a reputation for being crowded. We were lucky enough to be the first party to arrive on our chosen day so we headed straight for the most popular line on the cliff, Pete's Farewell (5.7).
Nominally Pete's Farewell is a three pitch climb, but pitch one is only about 40 feet of 5.2. And in reality most of the 40 feet is fourth class. There is probably just one move that qualifies as fifth class on the whole pitch. As we racked up to get started we talked about how we would divide up the pitches. I said I was attracted to the traverse and corner climbing of pitch two and less attracted to the pure handcrack of pitch three. It seemed like I'd hardly gotten the words out when Adrian was already at the belay point for pitch two, having run up the first pitch while placing exactly one piece of pro.

(Photo: Most of the way through pitch two of Pete's Farewell.)
Pitch two is rated 5.6. It begins with a traverse of 20 feet or so to the obvious corner with a crack at the back. There is a pretty good ledge for the feet all the way over to the corner, although there is a little gap that must be stepped across right at the same time the handholds suddenly seem to disappear. It took a little looking around but I found good hands for the step across, then the foot rail became wider and I walked more than climbed the rest of the way over to the corner.
Once at the corner I had to step up into the crack. This to me was the crux. There is fantastic gear available, but still the move is committing. You have to get into the stem/layback with feet that aren't really great. Once I went ahead and made the move, it was no problem, but I was once again confronted with the same old Adirondack feeling of being sandbagged. I couldn't remember the last time I felt so insecure on a 5.6. Once established in the corner, the next few moves don't require quite the same gut check, and before you know it you're out of the corner and at the belay.

(Photo: A few moves up the 5.7 pitch three of Pete's Farewell.)
The final 5.7 pitch was Adrian's lead, and this pitch yet again felt challenging for the grade to me. The pitch follows a slanting handcrack and it is hard to make the first move up into the crack. Once you're in it you've got another good move to a horizontal before the angle eases to the finish.
I thought the two main pitches of Pete's Farewell were both great, and very different from each other. We descended by rapping down the chimney behind the cliff. There is a fixed line that gets you to a ledge inside the chimney and then a walk over to a set of bolts will put you in a position to get to the ground, at the base of Pete's Farewell, in a single-rope rap.
We wanted to do the other most popular line at Pitchoff, The El (5.8). But unfortunately we were no longer alone at the cliff. Pete's Farewell and The El start at the exact same place, and as we rapped down we could see a party coming up the approach pitch for both climbs, as well as another pair on the ground waiting to start up. We were happy to learn that the first of these parties was planning on Pete's, not The El. I decided to just rap at an angle over to the stance for the start of pitch two of both climbs and get in line to begin leading the El as soon as they were out of the way. We were sort of jumping in front of the party on the ground. Was this wrong of us? I don't know. They didn't complain. Carpe Diem, bitches.

(Photo: At the most exposed moment on the 5.7 pitch two of The El.)
It was my turn to lead again so I took on the big traverse that makes up the second pitch of The El. This pitch heads towards the same corner as Pete's Farewell, but instead of going up at the corner, the traverse continues to the outside arete beneath a little overhang, and then around this outside corner/arete onto the face. The traverse then goes on another 20 or 30 feet until you are beneath a crack system that leads up to a big left-facing corner.
Lawyer & Haas call this a 5.7 pitch. I had a fun time leading it and thought it was totally mellow, perhaps because I'm used to traverses from my Gunks experience. The pitch becomes a touch more steep and thin once you come around the arete and onto the main face, out of your belayer's sight. But there is great pro throughout. I never felt like I was at any risk of taking a swing. And the crux is short; the climbing mellows again after a couple moves.

(Photo: Looking up at the 5.8 pitch three of The El.)
The final, 5.8 pitch of The El is another fun, high-quality pitch, with good face moves up to the big corner and then an awkward escape up and right to the top. I felt pretty good about my escape from the corner. Adrian on lead employed an ass-jam onto the shelf above, but I needed just a brief elbow to get through it. A nice pitch, and sustained too. I wouldn't call it a sandbag but it has several 5.8 moves on it.
We liked The El even more than Pete's Farewell, though both climbs are very worthwhile.
By the time we got down from The El the small cliff had become quite crowded. Since pretty much everyone was there for the two climbs we'd already done, we had our pick of other routes we could still do. But with plenty of time left in our day, we decided to head out from Pitchoff and give Barkeater Cliff a try.
When we arrived at the parking lot (at the scenic headquarters of Rock and River guides) we set off immediately on the Jackrabbit trail. There was an obvious, wide path into the woods that matched the description in the guidebook. After about fifteen minutes on the trail we came to a wooden bridge, as the guidebook said we would, and then we started to look for the cairn to our left that the guidebook said would lead us to Barkeater.
But there was no cairn to be found.
So after a bit we started up left, hoping to cross the correct climbers' trail or stumble upon the cliff. The going was steep. We kept going up, trending right, trending left, looking for rock. But no dice. Occasionally we stopped to listen for the sound of clanking carabiners, or belay commands. We heard nothing.
After who knows how long, I tried to use my smart phone to figure out our gps coordinates. But I guess I don't have the app for that; it was fruitless.
Then I looked again at the map in the book, and I realized something was off. There were two little creeks on the map, coming to a "T" at the wooden bridge. But at the bridge we'd crossed we had only seen one little creek.
I started to think we were in the wrong place entirely, but for some reason we kept bushwhacking around. Finally I suggested to Adrian that we head down and retrace our steps. Maybe we'd missed a turn on the Jackrabbit trail; it hadn't been that easy to follow with all the fallen leaves.
As we started to head back, we ran into another pair of climbers.
I have never been happier to see other climbers! I figured they could tell us if we were in the right place.
But no. They were new to the area as well, and were also looking for Barkeater. They were just as lost as we were. In fact, they'd come out to Barkeater after bushwhacking for two hours looking unsuccessfully for Hurricane Crag! Now, I have never been to Hurricane Crag. I don't know if it is really that hard to find. But I had to pity these two. Having just spent an hour and a half searching vainly for Barkeater I wasn't about to criticize them.
I suggested to Adrian that we give up. We could go back to the car and drive to the Beer Walls, near Chapel Pond. They'd be easy to find, and we'd still have time for a couple of pitches.
Back at the parking lot, I was about to put my stuff in the car when I saw an obvious, clear sign pointing to the Jackrabbit trail. It was on the opposite side of the lot. Somehow we'd missed this sign when we pulled up. We'd headed down the wrong trail from the very beginning!
We felt like morons for sure.
If you're moronic like us, please take note. There is a sign at the lot that points to the correct Jackrabbit Trail. Do not go on the other obvious (but unmarked) trail that leaves the parking lot. It will not take you to Barkeater Cliff. Once you're on the correct Jackrabbit trail, the bridge and the cairn could not be easier to locate.
Once we found the cliff, I was impressed. Most of the climbs are just one pitch, but the cliff is still imposing, and beautiful too. The remote setting was refreshing after our morning at the roadside Pitchoff Chimney Cliff.
We didn't have time to do much at Barkeater. I wanted to lead either the face climb Eat Yourself a Pie (5.8+) or the crack climb Mr. Clean (5.9). I expected that given my skill set (and the fact that I love to bake and eat pie) I would choose the face climb, but as we examined Eat Yourself a Pie some guys working on a 5.12 told us they thought it was pretty "in your face" for a 5.8+.
I figured if the guys who climb 5.12 think Eat Yourself a Pie is hard, then maybe I should pick the other climb.
And so I gamely went at Mr. Clean (5.9), a wonderful 60-foot handcrack pitch. I do believe I've made some crack-climbing progress in these visits to the Adirondacks, but since jamming still is not my strong suit I felt insecure the whole way up, and wore myself out constantly placing and replacing gear. I brought up doubles of all the bigger cams and I kept leapfrogging the yellow and red Camalots. If I could have relaxed more and placed about half as much gear, I think I would have led it cleanly, but as it happened I did pop out while stemming at the crux, taking a short fall on a perfect cam placement. Then I finished the pitch.
It was an educational pitch for me. Adrian led it after I did, jamming with his left hand and foot the entire way up, at times ignoring very good face holds in the process. After watching Adrian do it, I tried it again on toprope and cruised to the top, no problem. I tried to do it his way but it just seemed silly to avoid the good holds outside the crack and so sometimes I used them. Then after I toproped it Adrian gave it another go on toprope as well, laybacking and stemming the whole way instead of jamming. He still made it to the top but found it far less secure than when he jammed it.
I wish we had just a few cracks like this at the Gunks so I could get this kind of practice there.
Adrian led Eat Yourself a Pie after we were through with Mr. Clean and I have to say that "in your face" is an apt description for it. The pitch starts with thin face climbing left and up to an arete, with pretty shaky pro for the opening move and a bad landing on pointy boulders if you blow it. Then the crux comes as you move into an alcove and make a very awkward escape from the alcove (with good pro). Finally, lower-angled face/slab climbing takes you past two bolts (it might be nice if there were three) to a steeper corner, which leads to a fixed anchor.
A full quality pitch, with tons of good moves, and yet another testament to how serious the grades are in the Adirondacks.
These two climbs were a great introduction to Barkeater. I'd go back in a heartbeat to repeat them and explore the rest of the cliff.


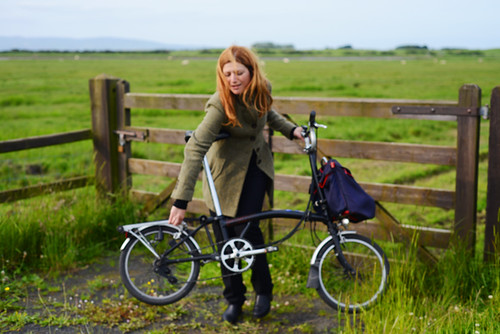


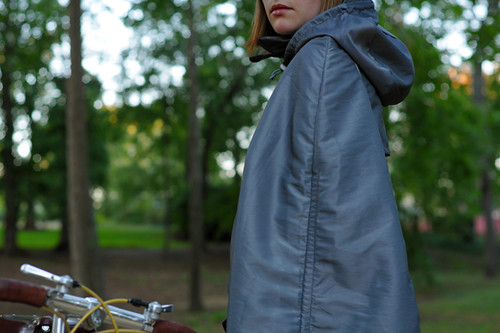 When asked to review the Iva Jean Rain Cape, I immediately recalled theremarkably successful photosof this item I had seen in the lookbook several months earlier. I'd been mesmerised by the stunning model and bicycle, by the perfect combination of my favourite colours, by the foggy, milky, electric feel of the whole thing. But a staged photoshoot is one thing; the article of clothing itself could be quite another. What we have here is essentially a silver hooded cape, to be worn on a bicycle. The skeptic in me was thinking that few of us can pull off a garment like that without looking like we are headed to a sci-fi convention.
 When the Iva Jean cape arrived, I was relieved to find it quite wearable. The colour is a metalic slate gray, in no danger of being confused with an aluminum foil alien costume. The fabric is fluid and drapey, not stiff. And it is mostly noiseless (no swooshing).
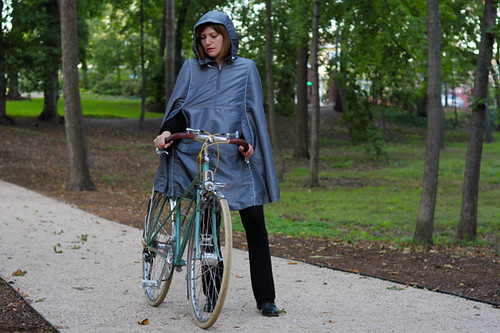 The cape is made in Seattle out of a water-repellent, breathable nylon-polyester blend fabric with reflective piping. It is one size only and hits mid-thigh. I don't want to repeat manufacturer specs, so please read the complete list of featureshere.
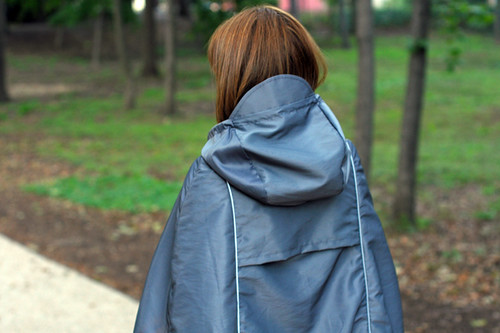 Close-up of the hood, visor, rear vent and reflective piping.
 The hood is roomy and can be loosened and tightened using a system of drawcords.
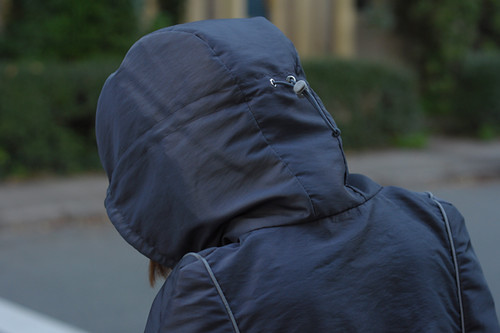 Rear view.
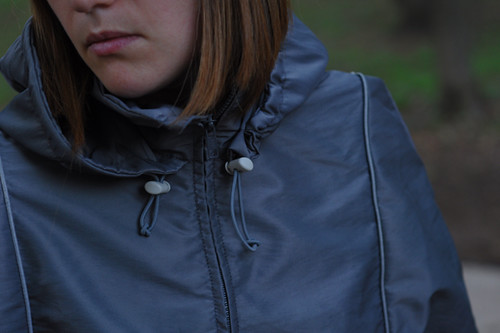 Stand-up collar inside the hood. The zipper extends half way down and makes the cape easy to put on and take off.
 The arm openings have velcro closure, as does the large front pocket. There is also a system of drawcords and thumb loops on the bottom for keeping the arms inside the cape.
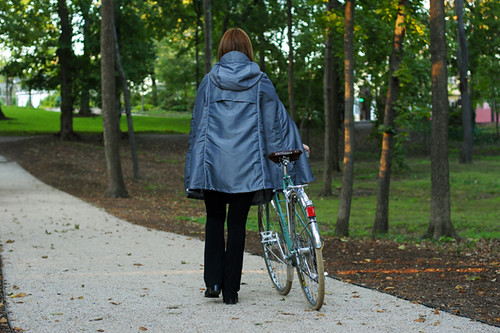 Full rear view.
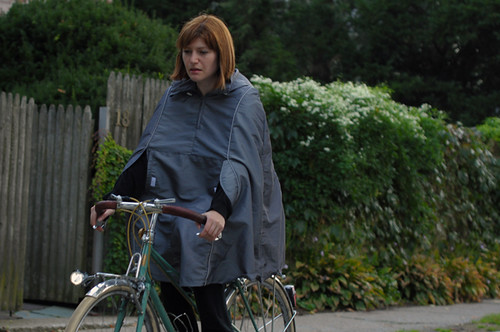 In use on the bike.Speaking generally, I must admit that I am not a "bicycle cape person." When I look down and see a tent draped over my legs, it abstracts the pedaling experience for me. That said, this cape is so lightweight, that this effect is diminished. What I like about it particularly is the breathability, the flattering shape, and the ease of movement it affords off the bike.With capes I can sometimes feel as if I am getting tangled in them, but this onehas such an airy feel to it, that I could hardly tell I had it on.
 Having worn the cape in the rain a couple of times, the coverage was sufficient and there were no problems with the waterproofing. As far as temperature regulation, the cape functions as a light shell and you can layer underneath it.The vents provide good ventilation on warmer days.The front can be zipped all the way up to cover the neck up to the chin on days when you wish for a scarf.
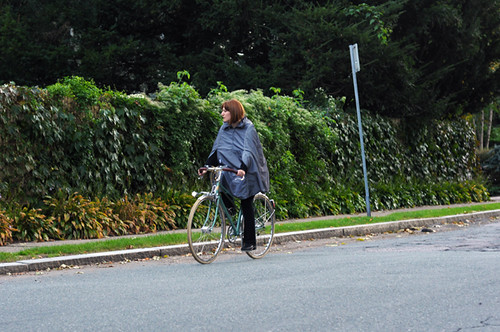 The Iva Jean Rain Cape is available for sale online, and the retail price is $240. If you would like my review sample, please leave a comment with your email address by Monday, November 28th, 11:59pm Pacific time and I will choose a recipient at random. Continental US entries only please. In my opinion this cape will fit women up to size 10 US.

 Naval Air Station in Norfolk, Virginia. In April 1971, I attended photographer's Mate "A" School in Pensacola, Florida and after that training was completed I returned to NTC Bainbridge! The base closing was announced in 1971 and I attended the last WAVES formal graduation on May 12th 1972, which was for company 28-72 . I thought it was sad that, according to the scanned article below, there were four additional companies that completed their training at Bainbridge but they apparently did not have a formal graduation ceremony. I can't imagine going through Basic Training without having some kind of ceremony to mark its completion.
 The photographs in the above article are credited to PH3 Becky Wise. . . but it really was me that took them, I was the only Navy photographer on base at that time.


